
Operculicarya decaryi Root Cuttings: Evidence Guide
Learn what supports Operculicarya decaryi root cutting, when to wait, how to preserve polarity, and whether pumice or rooting hormone is worth buying.
Nathan Brooks · 2026-07-14 · Updated 2026-07-31 · 16 min read
Key Takeaways
- O. decaryi can regenerate from a tuberous root piece, but the published cultivation evidence is observation, not a controlled protocol. One society account reports leaves in about three weeks with no success rate.
- Start only with a vigorous, traceable cultivated parent, and skip the cut if the plant is your only valuable specimen or provenance is unclear. The expensive decision is whether to disturb a healthy mother at all.
- Mark the proximal (crown) end before separating the root, use a clean tool, and keep the piece stable in a medium whose moisture you can monitor. Do not press the cut face or tug the piece.
- A dry surface is not a healed callus, and one shoot is not proof of roots. Require converging signs (new roots at the drainage hole, repeatable water-use change, growing stability).
- Pumice may fix a structure problem, but 0.1% IBA hormone has no demonstrated advantage for this species and its label may conflict with a dry start. Buy only to solve a named setup problem.
The expensive decision in this project is not which powder to buy. It is whether a healthy mother plant should be disturbed for an experiment with poorly quantified odds. Separate the few species-specific observations from general root-cutting practice before lifting the plant.
Can Operculicarya decaryi grow from a root cutting?
Use the Cultivation Account as Possibility Evidence
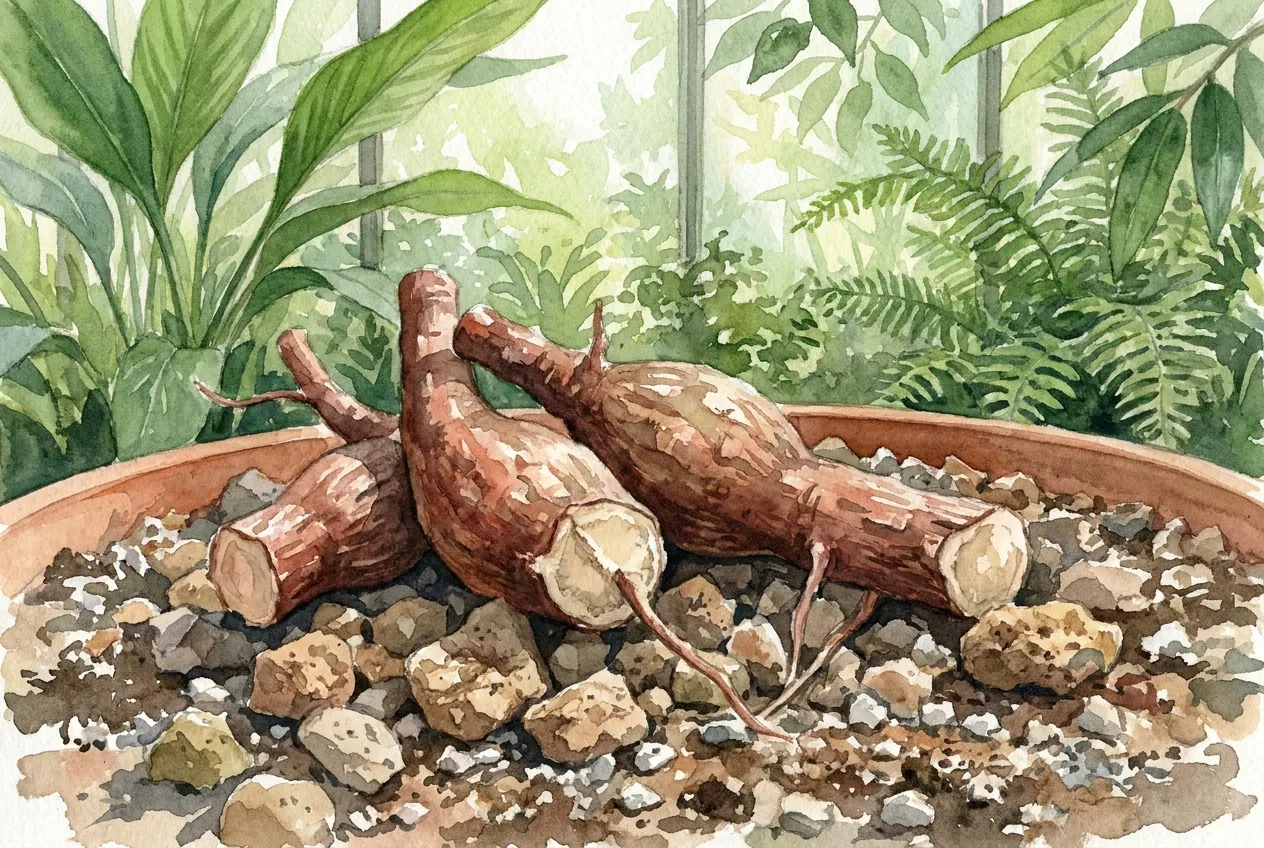
Yes, the method is documented in cultivation. A 2024 Henry Shaw Cactus and Succulent Society profile calls a piece of tuberous root the practical propagation method and describes new leaves at its tip. An older society profile also mentions tuberous-root pieces in a moist mix. The CITES listing proposal for the species discusses propagation from tuberous roots, stem cuttings, and seeds.
Keep the timeline and success claim bounded
That evidence supports possibility, not a recipe. The society account is a grower observation with no untreated comparison, sample size, loss rate, substrate measurement, or root-development record. Its reported three-week timeline is one observation, not a guarantee that a functional root system exists by then.
| Evidence tier | What it supports | What it does not establish |
|---|---|---|
| Species cultivation account | A tuberous root piece can produce a shoot | Success rate, internal root growth, or a universal timeline |
| General root-cutting guidance | Preserve polarity, choose vigorous roots, limit damage to the parent | An O. decaryi section size, depth, medium, or season |
| General wound and rooting research | Regeneration depends on tissue state, reserves, hormones, and environment | A product dose or watering trigger for this species |
Is summer actually the best time?
Use the Waking Phase Rather Than the Hottest Month
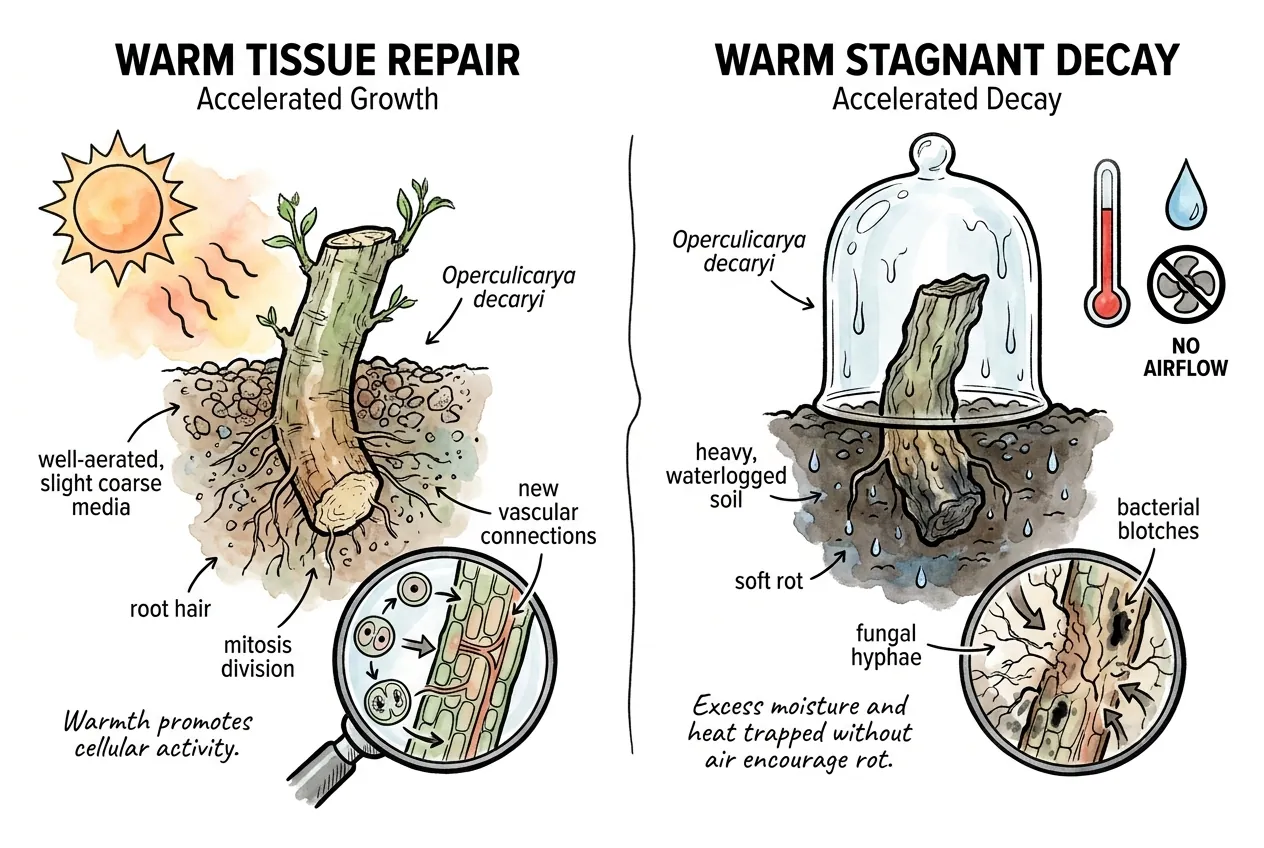
No source located establishes summer as the safest season. The most relevant grower account says spring or early summer while the mother plant is waking from winter dormancy. That is narrower than choosing the hottest month, and it still comes from observation rather than comparison.
Use parent condition as the gate
Use the plant's condition as a gate. A stable parent entering active growth is a more defensible candidate than one that is leafless from stress, newly imported, recently repotted, or declining. If you are unsure whether leaf loss is seasonal, resolve that first with the Operculicarya dormancy-or-root-death checklist.
Measure warmth instead of assuming it helps
Warmth can support metabolism, but heat also raises water loss and can make an overly wet, stagnant setup fail faster. There is no validated temperature or humidity target for this propagation method. Record the actual root-zone temperature and room conditions instead of using the calendar as a substitute for measurement.
Should you cut the mother plant at all?
Protect the Parent Before Testing Propagation
Skip the procedure if the plant's provenance is unclear, if it is your only valuable specimen, or if exposing a suitable root would require major structural damage. Seed propagation may be slower, but it does not trade the health of an established parent for an uncertain cutting.
Before the mother plant leaves its pot, I prepare the cutting container, medium, clean support, labels, camera position, and repotting space. The stop conditions are written down before any roots are exposed. They include an unexpectedly weak root system, no expendable section, diagnostic discoloration, or a harvest that would destabilize the parent.
I also decide which single root position I am willing to assess on a duplicate photograph of the planted specimen. If reaching it requires tearing through a dense feeder-root zone or dismantling the displayed root structure, I replant without taking a piece. An aborted attempt stays in the record because it explains the disturbance and prevents me from describing a later retry as the plant’s first lift.
Verify trade requirements before cutting or shipping
O. decaryi is listed in CITES Appendix II. CITES regulates international trade, not universal domestic ownership. The listing proposal had no annotation, so international movement of recognizable root material can fall within the listing. Requirements depend on the countries and transaction. Ask the relevant CITES Management Authority what documents are required before a plant or root piece crosses a border.
Keep provenance records with the parent identity
CITES also gives artificially propagated a specific meaning. The plant must be grown under controlled conditions from qualifying propagules derived from cultivated parental stock. A wild-collected parent does not become compliant merely because someone later cuts a root from it. Keep the seller invoice, propagation statement, permit or certificate details, and parent identity together.
Treat general root-removal limits as an outside ceiling
General RHS guidance advises selecting young, vigorous roots and taking no more than one-third of a parent root system. That number was not developed for O. decaryi. Treat it as an outside ceiling from general horticulture, not a target. For a caudiciform whose displayed roots are part of its value, much less or no cutting at all may be the better decision.
How should you mark and place the root section?
Mark Polarity Before Separating the Root
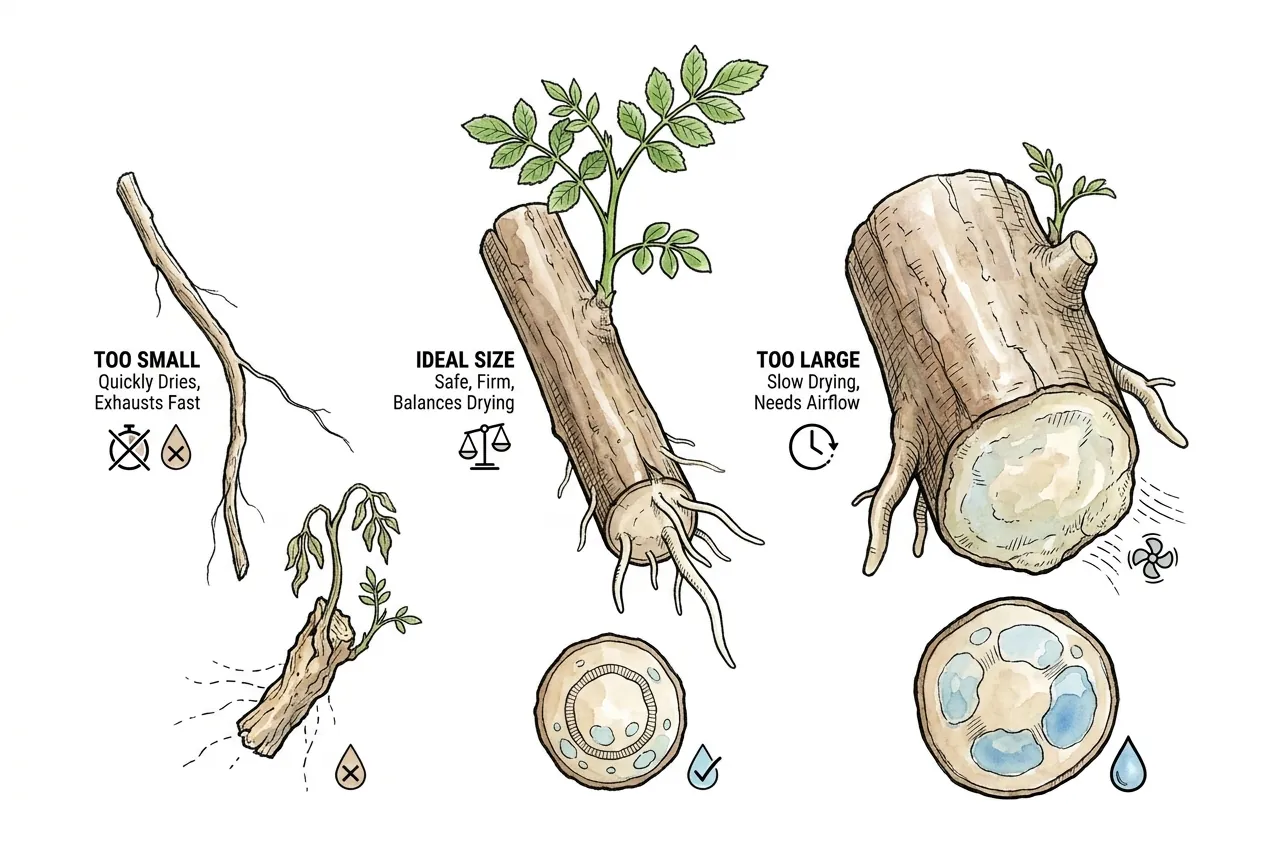
Polarity is the first thing to preserve. The proximal end was nearest the crown, while the distal end was farther away. General RHS root-cutting guidance uses a horizontal cut at the upper, proximal end and an angled cut at the lower, distal end. Make the distinction as soon as the root is exposed. A label or pencil mark is cheap insurance.
Separate tool sanitation from wound treatment
Use a sharp tool that makes one clean cut without crushing tissue. Remove visible debris before disinfecting the tool, follow the disinfectant label and contact time, and let the blade dry. Keep alcohol, bleach, and other tool disinfectants off the plant wound. When working on a high-value specimen or any tissue that may be diseased, a new disposable blade can be simpler than guessing whether an old tool is clean.
Record dimensions instead of borrowing a size rule
RHS gives 5–15 cm as a general range for woody root cuttings and describes vertical or horizontal placement depending on the material. Those measurements are not validated for O. decaryi. Record length and diameter rather than calling a piece pencil thick, and use the least root removal that leaves a section you can stabilize without repeated handling.
Keep the parent and cutting workflow separate
After harvest, replant the mother promptly in a clean, suitable medium and monitor it separately. Do not use the same runoff, tools, or uncleaned tray for the parent and experimental pieces. If the root was exposed because the parent already had a soft or discolored area, stop treating the job as routine propagation and use a diagnosis-first process instead.
I separate parent safety from cutting success by giving the operation one identifier and opening two records under it. The parent record receives the pre-lift canopy, exposed-root photograph, exact harvest site, repot mass, and its own watering events. The cutting record receives the section dimensions, polarity, placement, pot mass, and its own watering events.
The parent and cutting never merge into one success note. A shoot on the cutting does not erase parent dieback, and a stable parent does not prove that the cutting rooted. I close the experiment only after reporting both outcomes, including a failed cutting beside an intact parent or a living cutting harvested at unacceptable cost.
Is a dry surface the same as a healed callus?
Separate a Dry Surface from Internal Healing
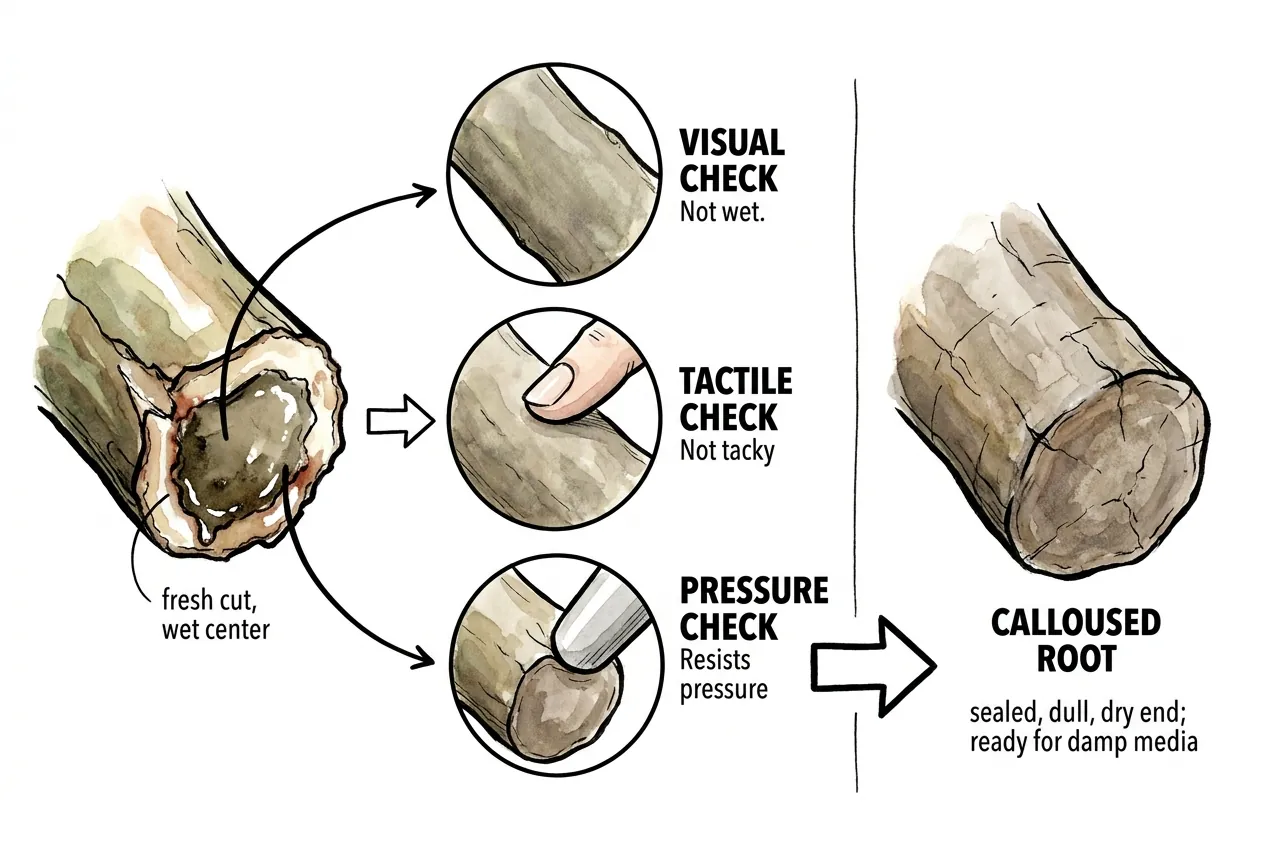
No. Dry, dull, and not tacky describe the surface you can see. A closing layer, proliferating callus tissue, and complete healing are different biological states. You cannot confirm them in a thick root piece by appearance alone.
Do not turn a generic callus window into a deadline
The often-cited four-to-seven-day callus window comes from general succulent stem and leaf guidance. It is not an O. decaryi tuberous-root result. Section thickness, the original tissue condition, humidity, airflow, and temperature can all change surface drying. Do not turn that generic range into a deadline.
Inspect without reopening stable tissue
Inspect without pressing the wound. Pressure can damage or contaminate the very tissue you are trying to protect. Do not recut a firm piece merely to see what is happening inside. A new cut resets the wound and removes reserves. If softness is increasing, fluid appears, or a lesion spreads, move to isolation and diagnosis rather than repeating the calendar.
Which rooting medium is defensible?
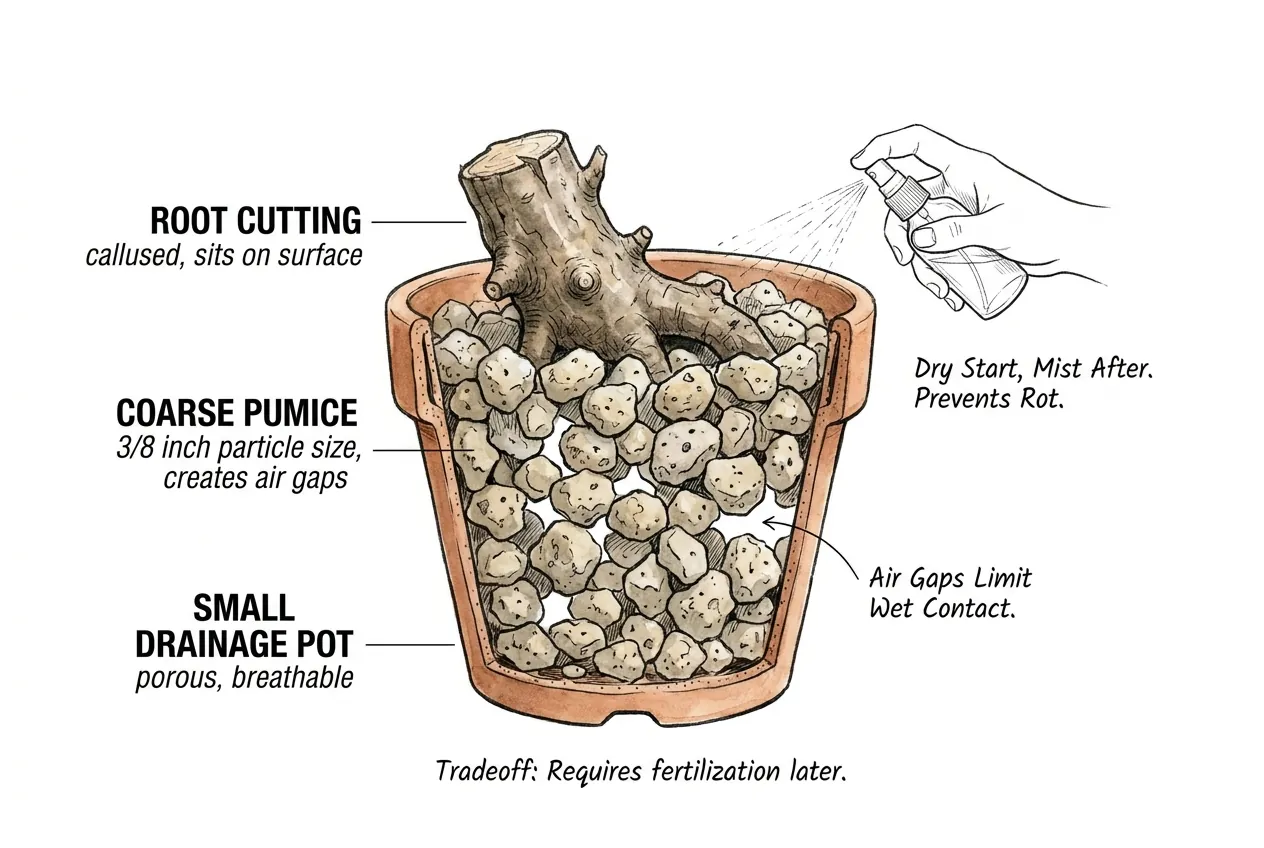
Choose a Medium by Its Observed Function
Choose by function, not by a universal recipe. The medium must hold the piece still, retain enough moisture for the method you chose, drain predictably, and allow gas exchange. Pot height, drainage holes, particle-size distribution, fines, room conditions, and watering technique matter as much as the ingredient name.
Stabilize the piece without packing the wound
A small, clean pot with drainage makes changes easier to measure and limits the volume of wet medium around an unrooted piece. It should still be wide and deep enough to anchor the cutting without crushing it against the wall. If a coarse mix lets the piece wobble, use a clean support rather than packing finer wet material tightly around the wound.
Buy pumice only when its variant is clear
Horticultural pumice is a conditional option, not a species-specific recommendation. If a listing offers multiple volume or particle-size variants, confirm the selected option at checkout and expect to inspect for fines. Skip it if you already have clean local pumice or grit, need a finer material to stabilize a small section, or cannot measure how fast the pot dries.
Do not confuse fast drying with suitability
Pure pumice also supplies little nutrition and can dry very quickly. Those are not automatic advantages. The right choice is the medium you can characterize in your pot and climate, not the bag with the most confident drainage claim.
Should you buy rooting hormone?
Do Not Assume IBA Helps This Root Tissue
Not for this experiment on the strength of current evidence. No trial located shows that IBA improves root formation, shoot regeneration, survival, or time to establishment in an O. decaryi tuberous-root piece. A product useful on common stem cuttings does not automatically solve the different job of rebuilding both roots and shoots from root tissue.
Follow the current label or skip the powder
A 0.1% IBA rooting powder must be used under its own current label. Directions vary by product, so do not transfer one label’s moistening, dipping, planting, or misting sequence to another powder. Instructions for a conventional cutting do not validate a dry, callused O. decaryi root protocol.
Use such a product only for a plant and cutting method covered by the current label in your jurisdiction, when you intend to follow that label exactly. Skip it for O. decaryi if the label does not clearly cover your use or if your plan depends on keeping the cut end dry. Wear the protection stated on the current container, avoid eye contact and inhaling dust, keep it away from children and pets, and never pour used powder back into the original package.
How should you decide when to water?
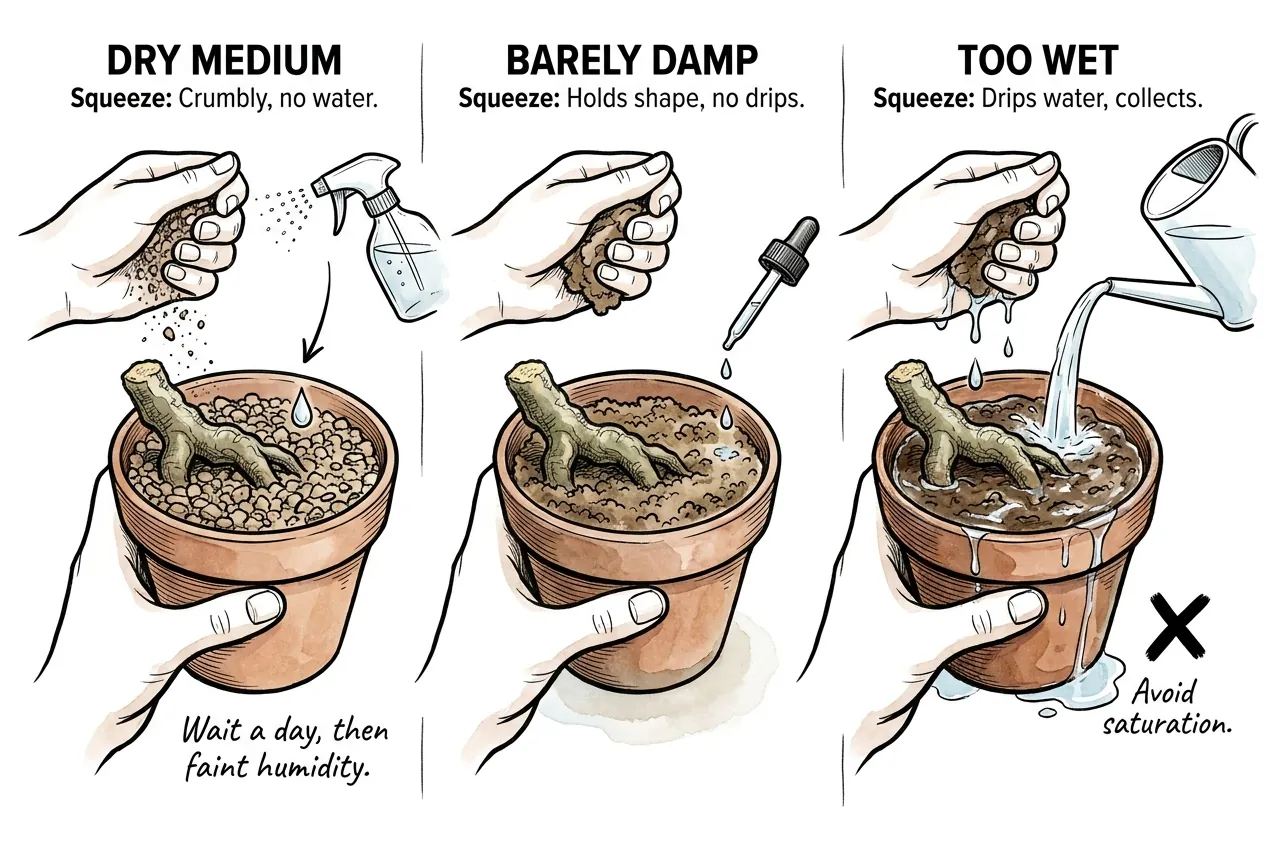
Do Not Use a Fixed Sip Schedule
There is no validated wait-one-day-then-add-a-small-sip rule for this species. Firmness is a starting condition, a shoot can run on stored reserves, and gentle resistance can come from anchoring rather than roots. None of those observations tells you how much water the piece can absorb.
Build a measurable baseline
Make the pot measurable before adding the cutting. Record the empty-pot mass, the mass with dry medium, and the mass after a known watering and full drainage. Note room temperature and humidity. These values describe your setup. They do not create a biological threshold, but they are more reproducible than feels cool or looks barely damp.
- Choose one documented method and write it on the label. Do not combine a dry-start routine with a hormone label that requires regular misting.
- Use one cutting per clean pot so a failure does not contaminate the whole batch and each pot can be tracked.
- Record every water addition and pot mass after drainage. Rewater only according to the selected method after confirming that the previous addition has substantially left the medium.
- Stop changing the routine merely because a few days passed. Escalate only when a trend, continued water retention, progressive shriveling, softening, leakage, or repeated growth, gives you a reason.
Keep unresolved watering uncertainty visible
Direct species accounts do not settle whether the medium should begin dry or moist. That uncertainty should remain visible. If you have one irreplaceable root piece, the honest choice may be to ask a propagator who has documented this species rather than improvise a watering trial.
Which signs show success or failure?
Require More Than One Sign of Success
A new shoot shows that some tissue is alive and able to mobilize reserves. It does not prove that new roots are functional. Stronger evidence is converging evidence, including repeated shoot extension, visible new roots at a transparent wall or drainage opening, increasing stability without testing, and a change in water use that repeats across several cycles.
Track without tugging or excavating
Do not tug or wiggle the cutting. A support can mimic resistance, and a real new root can be torn by the test. Do not unpot merely to satisfy curiosity. Photograph the same angle on a fixed schedule and compare measurements instead.
Before planting, I photograph the root section on a disposable gridded card with the proximal end always facing left. I record its length, widest diameter, cut-surface condition, natural curves, and every support point. That frame becomes the only time I handle the piece merely to document it.
After placement, I put removable marks on the outside of the pot showing the proximal end, distal end, original substrate level, and pot-rim orientation. I also take one overhead photograph before the final thin layer of medium hides the section. The marks let me reconstruct where the buried tissue sits without probing or excavating.
Each shoot or drainage-hole root is recorded against the buried piece’s mapped top, base, and side coordinates, but its position does not prove a complete root system. If the pot tips, support shifts, or piece is replanted, I close that record and establish a new baseline. Stability after a setup change cannot be compared with the old pot as though nothing moved.
Isolate progressive failure
Progressive softness, wet collapse, seepage, an expanding dark lesion, or unusual odor are reasons to isolate the pot. They are not a pathogen diagnosis. Move it away from the mother plant and other cuttings, stop shared runoff, photograph and date the change, and clean tools and surfaces. Bag discarded medium and failed tissue rather than returning them to a shared mix or casual compost.
Re-cut only advancing localized damage
Recutting is a limited salvage decision, not a reflex. It creates another wound and reduces reserves. If enough firm tissue remains and damage is clearly advancing from one end, a clean recut may be reasonable. If the piece is broadly soft or the plant is valuable, seek a plant diagnostic service. The caudex root-rot diagnosis guide explains why a generic fungicide should not be the first response.
What should you buy before you start?
Buy Only to Fix a Named Setup Problem
The purchase rule is simple. A cleaner workflow and better records are more defensible than an untested chemical stack.
| Need | Buy when | Skip when |
|---|---|---|
| Traceable parent material | The seller can document cultivated origin and any required trade paperwork | Provenance is vague or the plant appears newly collected |
| Sharp cutting tool | Your existing blade crushes tissue or cannot be cleaned reliably | You already have a clean, sharp tool suited to the root diameter |
| Small drainage pot and support | The piece cannot be held stable in a clean pot you own | A clean container and inert support already fit |
| Pumice | Your current medium is too fine or unpredictable and the selected bag specs are clear | Local aggregate meets the same function or coarse particles make the piece unstable |
| Rooting hormone (0.1% IBA) | A different, label-covered cutting method actually calls for 0.1% IBA powder | You are relying on an unvalidated dry-root protocol for O. decaryi |
| Scale and labels | You cannot otherwise record pot mass, dates, and treatments | You already own tools accurate enough for comparative tracking |
Confirm the decision before cutting
Before cutting, you should be able to answer five questions. Where did the parent come from? Is it actively stable? Which end of the root is proximal? Which single medium and watering method will you document? What evidence will make you stop? If any answer is missing, waiting costs less than replacing the mother plant.
Recheck current product details before buying
Any pumice or rooting powder you consider is best judged from its current label and specifications, not hands-on testing here. Size, packaging, price, availability, and labels can change, so confirm the current listing and label before using either product.
If lifting the parent also requires substantial repotting work, review the protective-gear decision guide before buying anything new.