
Bringing Caudex Plants Indoors: The 10-Minute Pest Gate
Bringing caudex plants indoors? Run a fast move-in inspection so mites, mealybugs, scale, and fungus gnats do not ride inside for winter.
Maya Ellison · 2026-09-01 · Updated 2026-10-24 · 10 min read
Key Takeaways
- Inspect at move-in, because warm dry indoor air releases pests that outdoor rain and predators kept down.
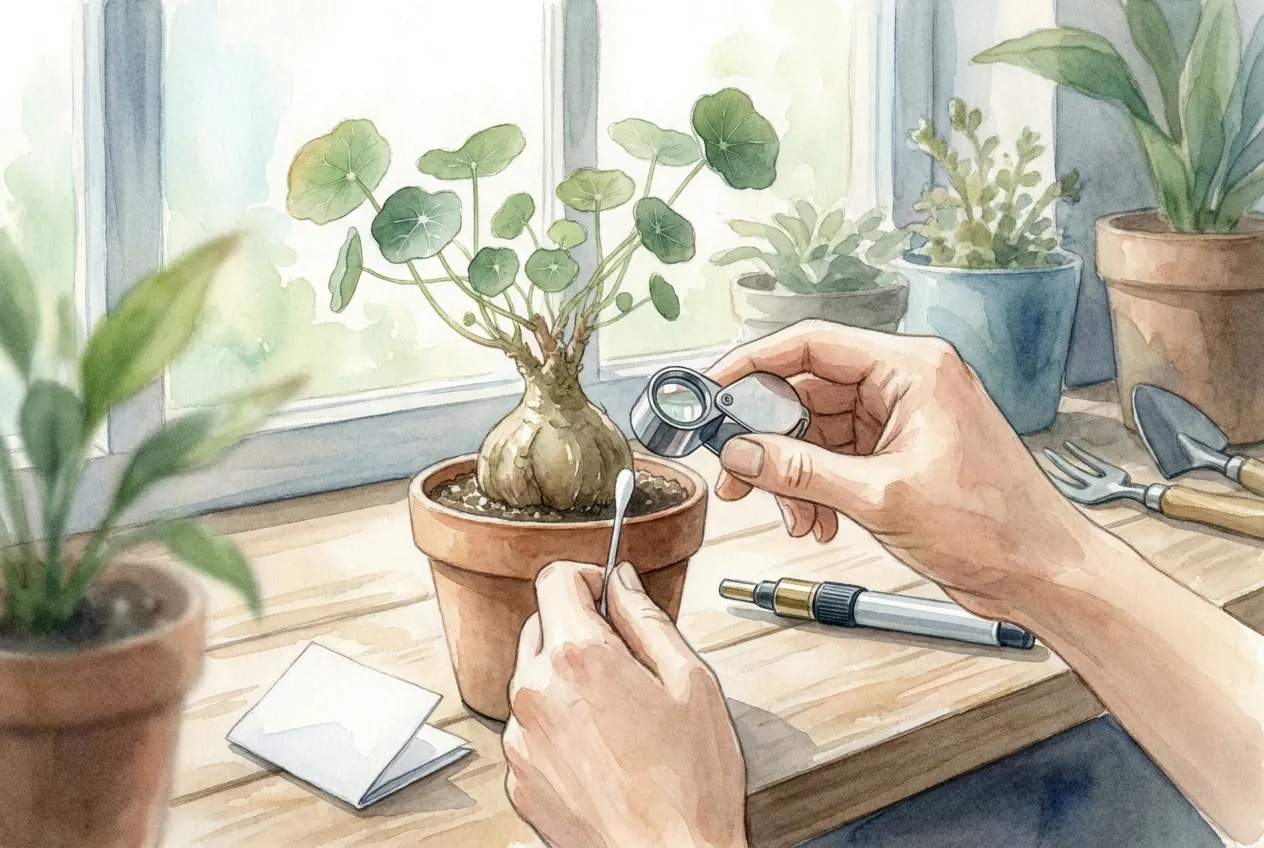
- Run one ordered route per plant with a loupe, white paper, a flashlight, and a swab.
- Moving specks need identification because predatory mites and harmless arthropods can also move.
- Check bark texture gently before treating it as scale.
- Keep all arrivals separate for at least three weeks, with a final inspection before release.
A plant can carry a small hidden pest population indoors or acquire pests from a neighbor. A clean-looking arrival needs both an entry inspection and continued observation before joining the collection.
Use the same inspection route on every arrival, then keep it separate from established plants. Ten minutes is a planning budget for a small plant, not enough time to certify a large specimen pest-free.
Why pests can increase after moving indoors
Moving indoors changes temperature, humidity, rainfall, and exposure to predators. Spider mites can multiply quickly in a warm, dry room, so a small outdoor population may become noticeable after the move. Inspect before bringing the plant into the collection and continue during isolation.
Where pests hide on a caudex
Each pest hides in a predictable place, and a fat-stemmed plant adds crevices a leaf-wipe never reaches. Learn the map once and the inspection becomes fast. You are visiting known addresses, not searching at random.
Spider mites work the undersides of leaves and the veins. Mealybugs pack into leaf axils, growth tips, and new leaf folds. Scale clamps onto stems, midveins, caudex bark, and graft unions as immobile bumps.
The caudex body is the part most people skip. Folds, old leaf scars, lenticels, and the crown where branches emerge all shelter scale and mealybug crawlers. On a pachypodium, the bark between spine cushions counts too.
Below the soil there is a second world. Fungus gnat larvae live in the damp top inch of substrate, and root mealybugs coat roots and the inside of the pot with white wax. Neither shows from above.
The hiding-place map
| Pest | Where it concentrates on a caudex |
|---|---|
| Spider mites | Leaf undersides and along veins |
| Mealybugs | Leaf axils, growth tips, new leaf folds |
| Scale | Stems, midveins, caudex bark, folds, graft unions |
| Aphids | Soft new growth and flower buds |
| Fungus gnats | Soil surface and top inch of substrate |
| Root mealybugs | Roots and inside pot wall, near drainage holes |
Simple check with a ten-minute route
For a small plant, allow two minutes for leaf tops, three for undersides and the tap test, three for axils and bark, and two for the pot and drainage holes. Extend the time if needed. This budget keeps the hidden zones from being skipped.
The tools you actually need
Prepare a loupe, fresh white paper, a flashlight, and clean swabs before starting.
| Tool | What it catches |
|---|---|
| 10x hand loupe | Mites, scale crawlers, early mealybugs |
| Plain white paper | Moving mites, via the tap test |
| Flashlight at a low angle | Bumps and webbing on caudex bark |
| Dry cotton swab | Confirms whether a cottony fleck smears |
The inspection route
Work top to bottom so you never backtrack. Each step targets one hiding zone from the map above.
- Scan leaf tops for pale stippling or discoloration.
- Turn every leaf and check the underside and veins with the loupe.
- Run the tap test over white paper.
- Check growth tips, axils, and new folds for cottony wax.
- Rake light across the caudex, folds, scars, and any graft union.
- Check the soil surface, drainage holes, and the pot edge.
How to read the tap test
Hold fresh white paper under one shoot and tap it three times. Watch for ten seconds, then inspect moving specks with the 10x loupe. Repeat on three shoots from different sides, or every shoot if there are fewer. Use fresh paper for the next plant so a speck cannot be carried into its result.
Movement confirms an organism, not a pest identity. Predatory mites and other small arthropods may also appear. Photograph an uncertain find through the loupe and keep the plant separate while identifying it. Look for pest mites together with feeding damage, eggs, or webbing before choosing a treatment.
The five signatures you are looking for
Most pests announce themselves through damage before you ever see the insect. Learn the signature and the confirming check for each one. That pairing is what turns a nervous guess into a confident decision.
Spider mites
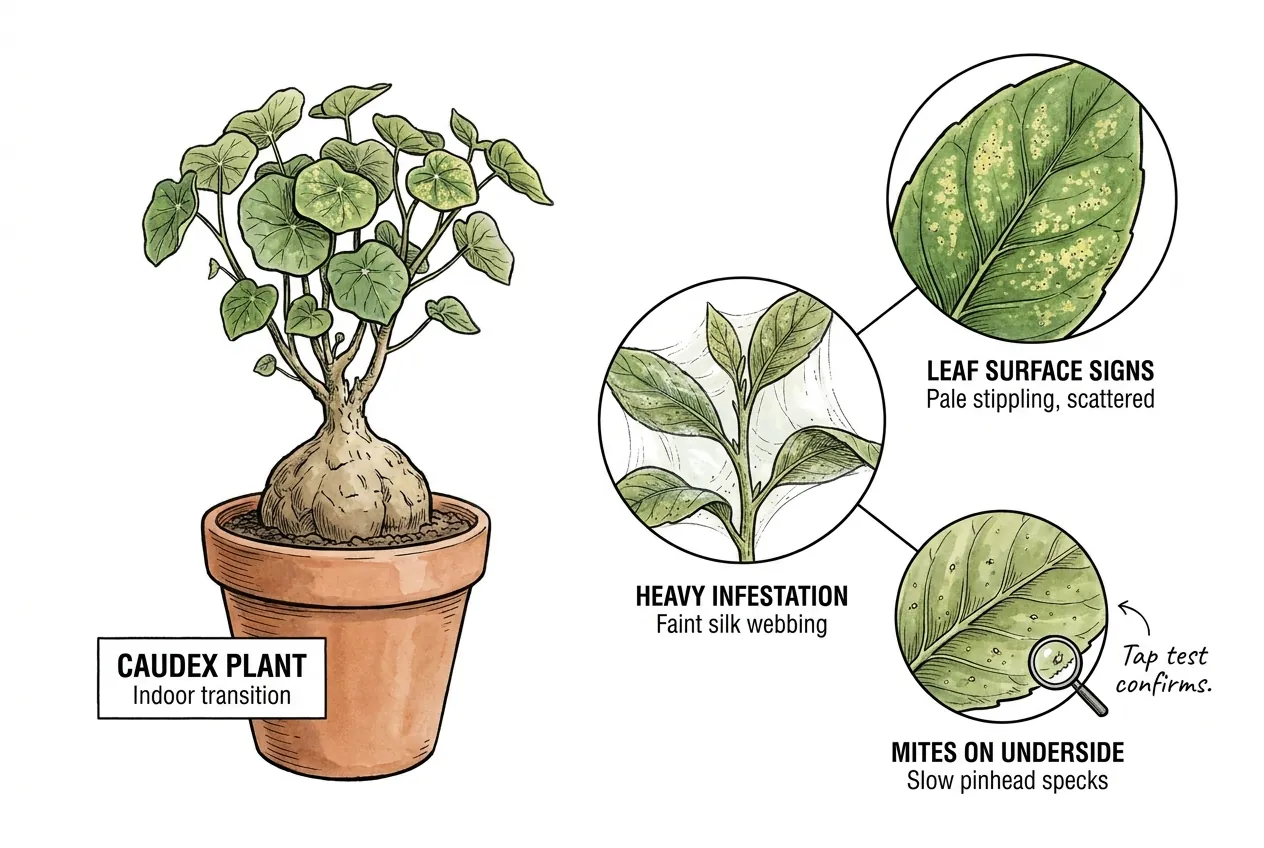
The first sign is fine, evenly scattered pale stippling on the upper leaf surface. Heavy infestations add faint silk webbing between leaf and stem. The mites themselves are slow pinhead specks on the underside, and the tap test confirms them.
Mealybugs
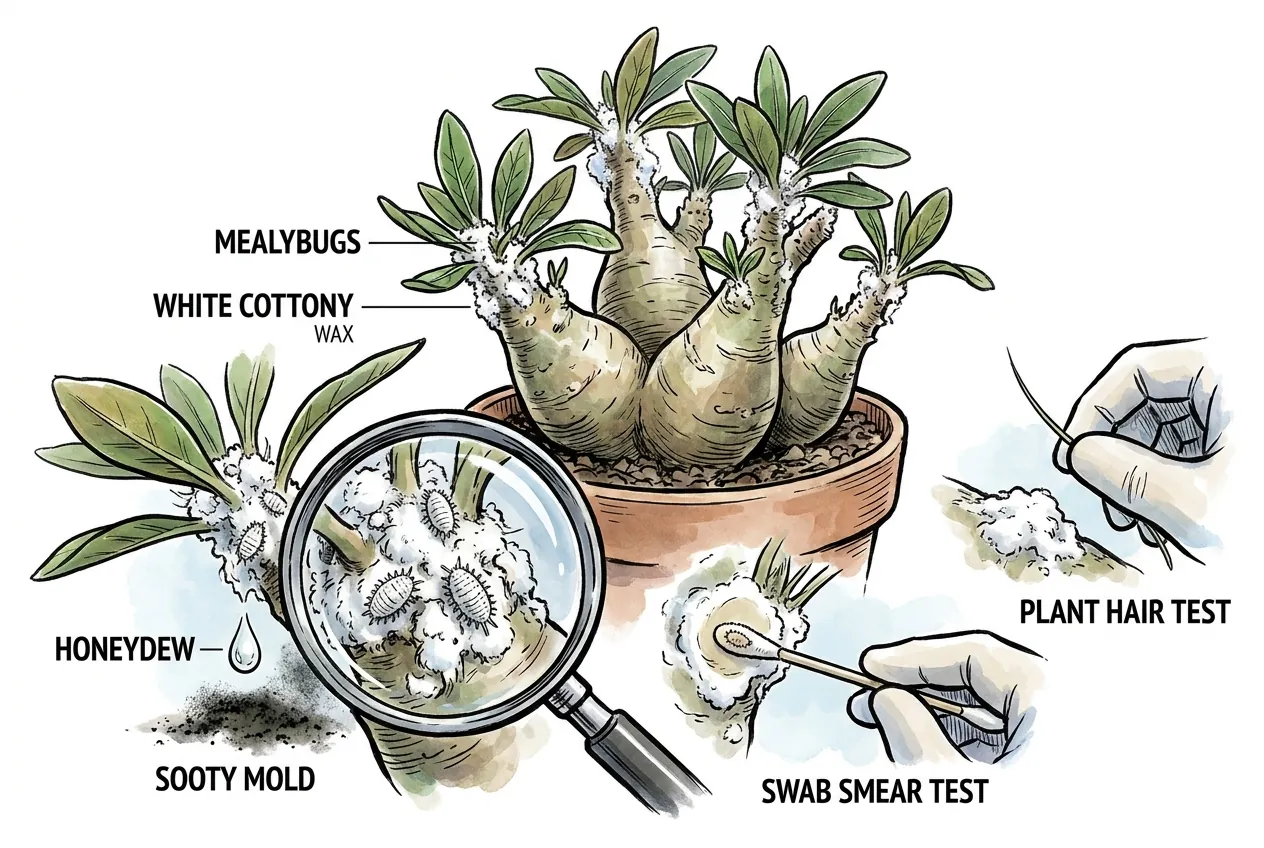
Look for soft bodies under white cottony wax tucked into axils and growth tips. Sticky honeydew and black sooty mold often show up nearby. A dry swab smears the waxy mass and reveals the insect, while a plant hair will not smear.
Scale
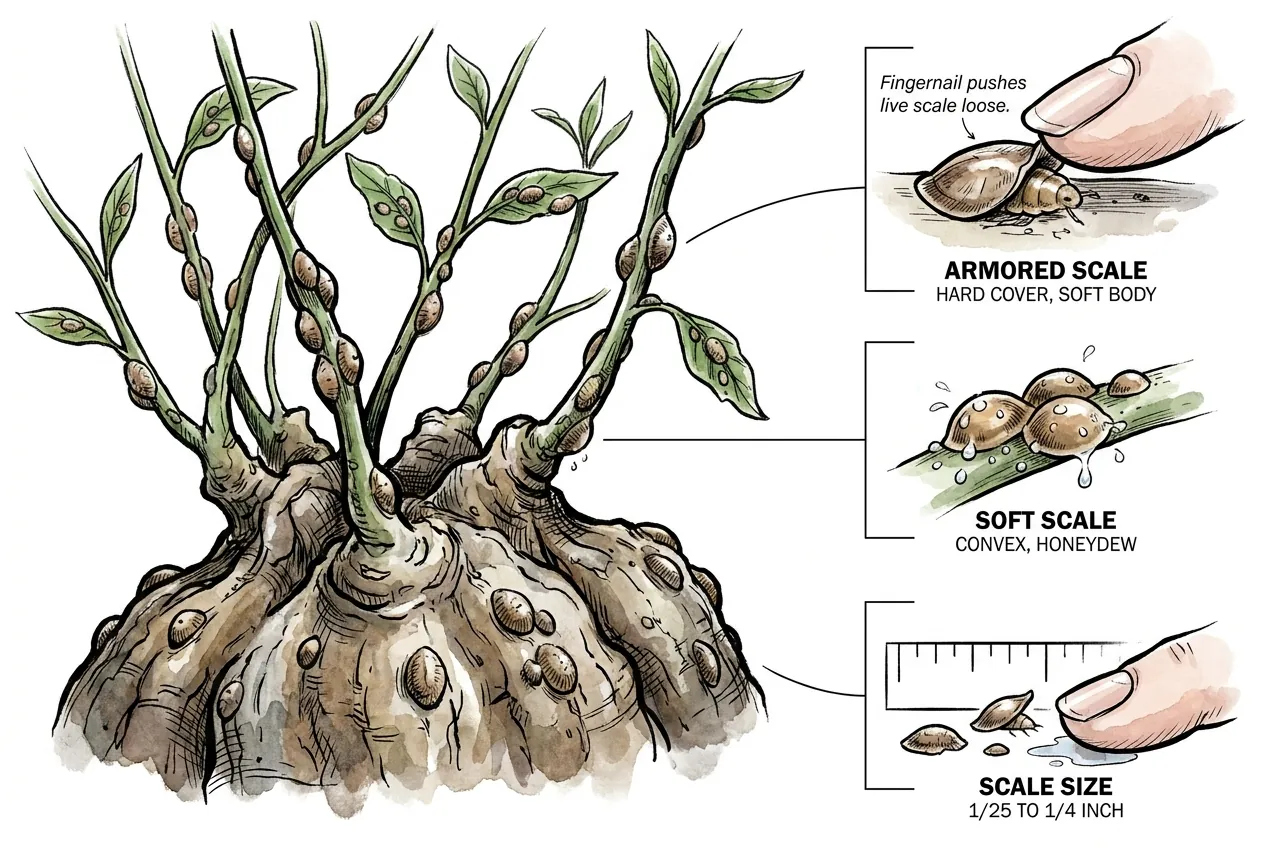
Scale can appear as fixed bumps on stems, veins, bark, or a graft union. An armored cover may lift away from the insect underneath. Probe one suspected bump gently with a wooden toothpick under magnification and stop if the plant’s own skin lifts. Soft scales can produce honeydew, while armored scales generally do not.
Aphids
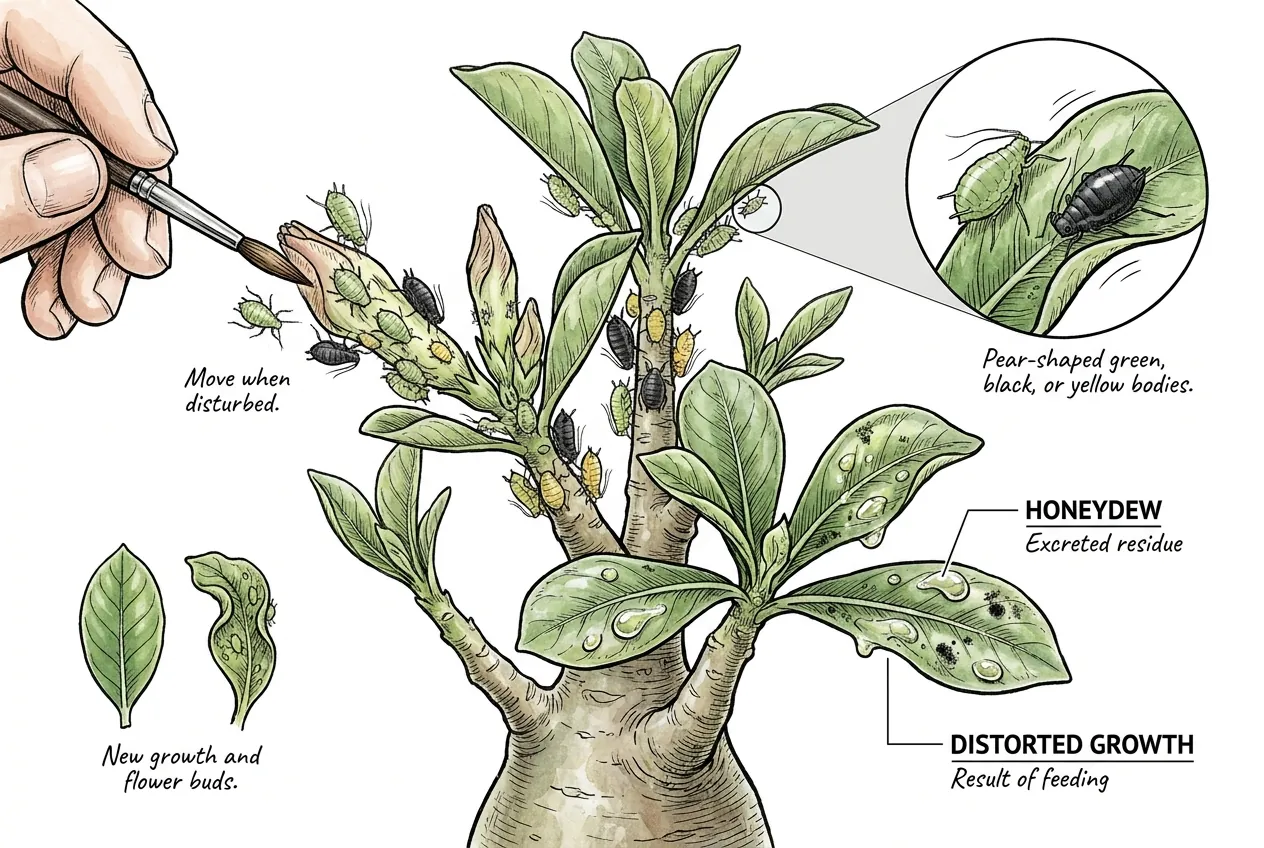
Aphids cluster on the softest new growth and flower buds as pear-shaped green, black, or yellow bodies. They leave honeydew and distorted growth. They move when disturbed, which separates them from static bumps.
Fungus gnats
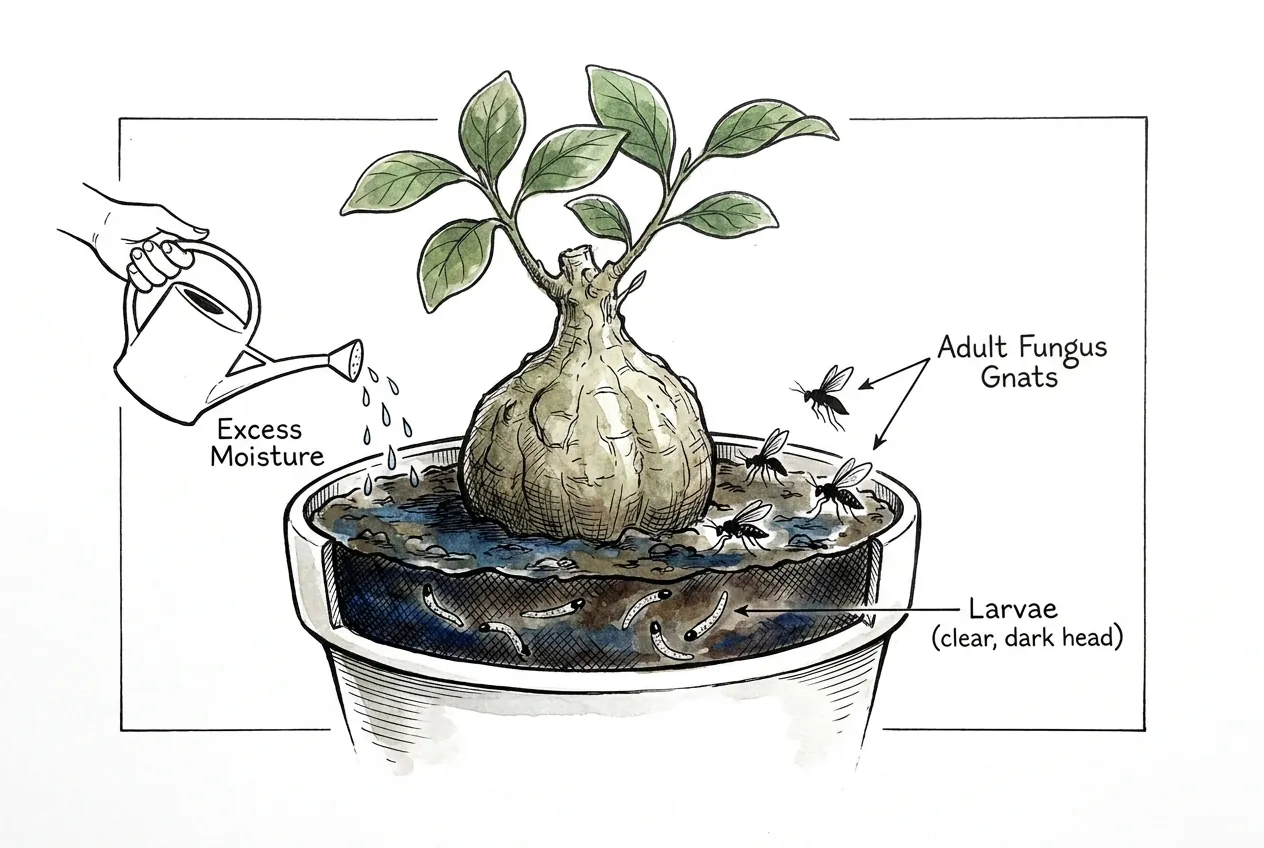
Small dark flies running across the soil or rising when you water are the adult tell.
The damaging larvae are clear with a dark head in the moist top inch of substrate.
Their presence also flags substrate that is staying too wet for a slow caudex.
Match each signature to its confirming check before you act, because the damage often shows up a week before the pest is large enough to see.
Bark that looks scary but is not a pest
Half of move-in panic is caused by normal caudex texture. Before you reach for a spray, rule out the cosmetic look-alikes. Treating bark as an infestation wastes product and stresses the plant for nothing.
Corking is dry, tan-to-brown suberized bark on older tissue. It is fixed, matches the plant, and has no soft body underneath. Edema is small raised blisters from water taken up faster than it transpires, common after a heavy watering in low light.
Lenticels are the bark pores, arranged in the plant’s own even pattern. Old leaf scars are symmetric structural marks where leaves detached. None of these move, spread, or leak honeydew.
A removable cover over an insect supports scale identification. A firmly attached dry feature without an insect may be bark, a scar, or edema. None of these checks is perfect, and the absence of honeydew does not exclude armored scale. Do not scrape healthy skin to force a result.
If you want the deeper firmness-and-fingernail workup for corking and scale look-alikes, the caudexology guide on scale, corking, and edema walks through it.
The pass the leaf check misses, the root zone
Inspect the soil surface, pot rim, drainage holes, and saucer. White wax near a drain hole deserves magnification because salts, fungal growth, and mineral grains can also look pale.
A yellow sticky card near the mix can reveal adult fungus gnats. It monitors flying adults and does not clear roots of mealybugs. Do not water a dry dormant plant simply to provoke a flight.
When to inspect the root ball
Unpot when insects or convincing wax deposits are visible at drainage holes, decline remains unexplained, or a repot is already needed. Loose gritty mix may fall apart, so sliding out the root ball is not automatically harmless. Above-ground mealybugs justify containment and a careful root-zone check, not automatic bare-rooting.
Why one look never clears a plant
All returning plants stay separate even when the arrival inspection finds nothing. Colorado State Extension recommends at least three weeks for incoming houseplants, followed by a careful inspection. That reduces introduction risk without guaranteeing that every hidden pest has appeared.
Measured check with dated inspections
Label arrival as day 0 and inspect again on days 7, 14, and 21. Photograph two marked reference leaves and one bark patch in the same light. At each visit, also inspect new growth, unmarked leaves, the pot rim, and drain holes. Reference leaves make damage easier to compare but cannot represent the whole plant.
Record live pest findings separately from old damage. A scar that has not changed is not a new infestation. If a confirmed live pest or fresh pest injury appears, treat appropriately and begin a new 21-day observation period after the last activity. This restart is a cautious household rule, chosen to include later emergence rather than trusting a brief symptom-free gap.
Release only after the observation period and a final whole-plant check show no live pests or fresh injury. Persistent uncertainty, root-pest evidence, or a treatment label requiring longer monitoring keeps the plant separate.
Keep arrival dates separate
Give each arrival its own dated tray and inspection card. If a new plant joins the quarantine area on day 18, it does not inherit the older plant’s day-21 release date. Inspect the newcomer separately and record any leaf contact, shared runoff, or shared tools.
Keep clean plants first in the handling order and suspects last. If pests are found on a newcomer that touched an older arrival, reassess both before release. A calendar only helps when it records the exposure of the actual plant being moved.
What to do when the gate finds something
The gate ends at diagnosis and containment, and treatment is the next decision. When a plant fails, it stays off the shelf, which is already the isolation posture from the quarantine step. First moves are physical and cost nothing.
For confirmed leaf pests, rinse foliage with a controlled stream while briefly shielding the mix and caudex from runoff. Remove the cover immediately afterward and let foliage dry in gentle air movement. Keep rinse water away from other plants. Physical removal can reduce numbers, but one rinse is not a clearance test.
For fungus gnats, remove standing water and let the surface dry as far as that plant tolerates. Do not impose a 1–2 inch dry layer on tiny seedlings merely for pest control. Persistent infestations need pest-specific management.
Choose treatment after identification and follow its label, including plant suitability and repeat intervals. Do not wait for webbing or a spreading outbreak once pest mites are confirmed. The first-week mite guide explains follow-up checks.